|
Adding the API to a Visual Basic .NET project |
  
|
|
Adding the API to a Visual Basic .NET project |
  
|
Find below required steps:
| • | Open the project you are working on |
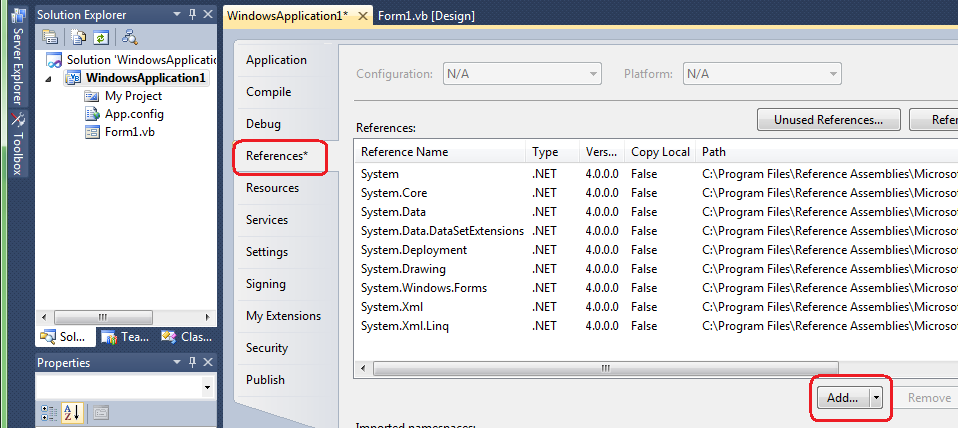
| • | Open the project properties and select the "References" tab then click the "Add..." button |

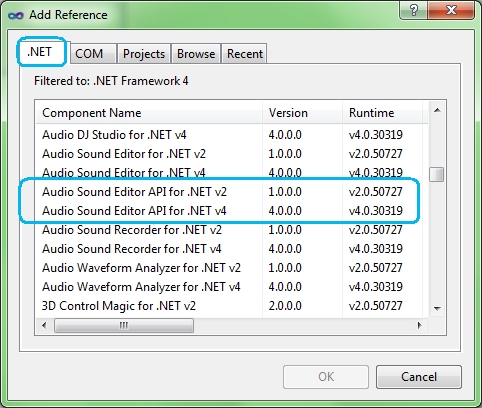
| • | Select the ".NET" tab and, on the list of installed components, find the component named "Audio Sound Editor API" as displayed below and, if your application targets .NET framework versions 2.0, 3.0 or 3.5, select "Audio Sound Editor API v2" or, if your application targets .NET framework 4, select "Audio Sound Editor API v4" |

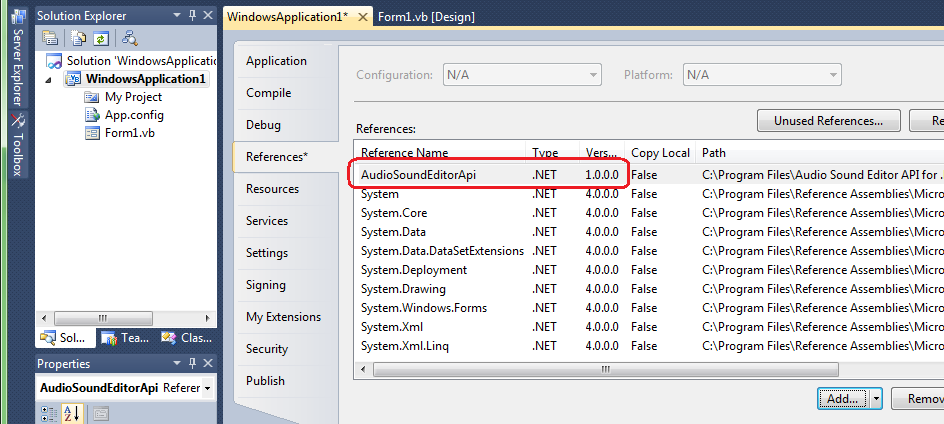
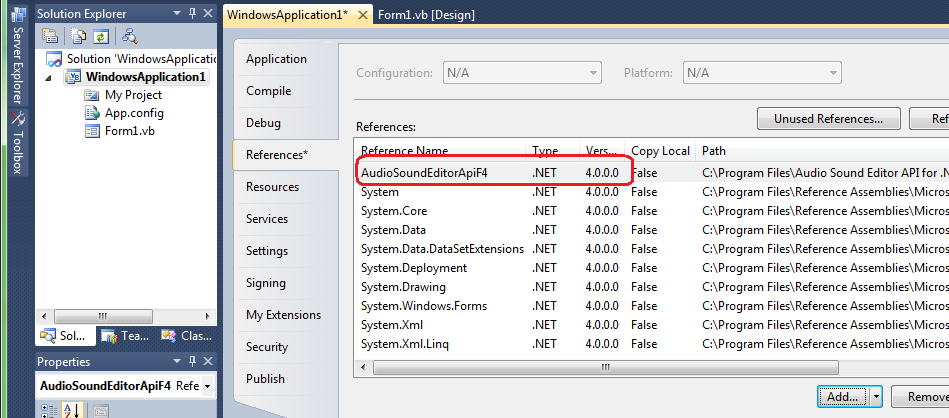
| • | Pressing the "OK" button will bring you again to your project working area and the References item of the Solution Explorer will appear like this: |

if you selected "Audio Sound Editor API v2" or like this

if you selected "Audio Sound Editor API v4"
| • | At this point we need to create a new instance of the component's class and, before starting sound editing management, to initialize the component: for this purpose it's mandatory a call to the InitEditor method. The code snippet below shows how to perform instancing and initialization of the component |
Visual Basic .NET |
' instance the API as a global variable Dim audioEditorAPI As AudioSoundEditorApi.AudioSoundEditorApi = New AudioSoundEditorApi.AudioSoundEditorApi()
' initialize the API at the beginning of your code audioEditorAPI.InitEditor()
|
| • | You can now start developing your code around the control as described inside the How to use the API in your projects section |
IMPORTANT: Before exiting the container application, in order to avoid memory leaks, it's recommended that you explicitly call the Dispose method of the API. Related to this recommendation, in case the instance of the API should be added to a secondary form that could be opened/closed various times, be sure to avoid declaring the instance as "static" or you may experience instabilities of the code.
|